To install an eSIM on your iPhone using the QR Code method, follow these concise steps:
1. Verify Compatibility and Prerequisites
- Ensure your iPhone model supports eSIM (iPhone XS or newer, iOS 16+).
- Confirm you have a stable Wi-Fi connection (required for some carriers during activation).
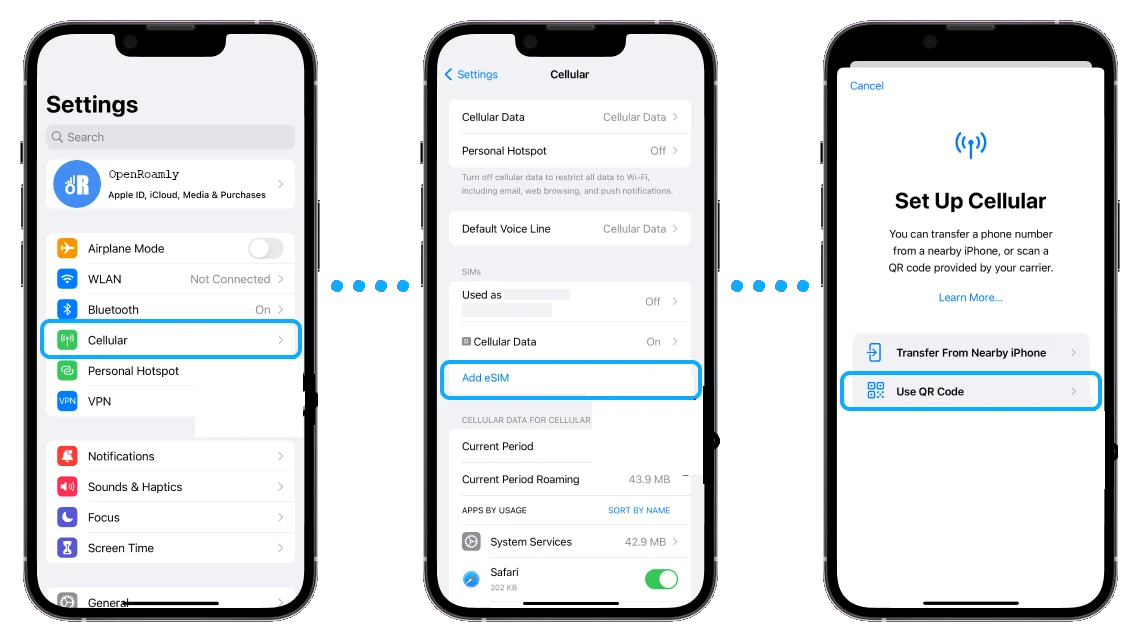
2. Initiate eSIM Installation
- Go to 'Settings > Cellular', then tap 'Add Cellular Plan'.
3. Scan QR Code
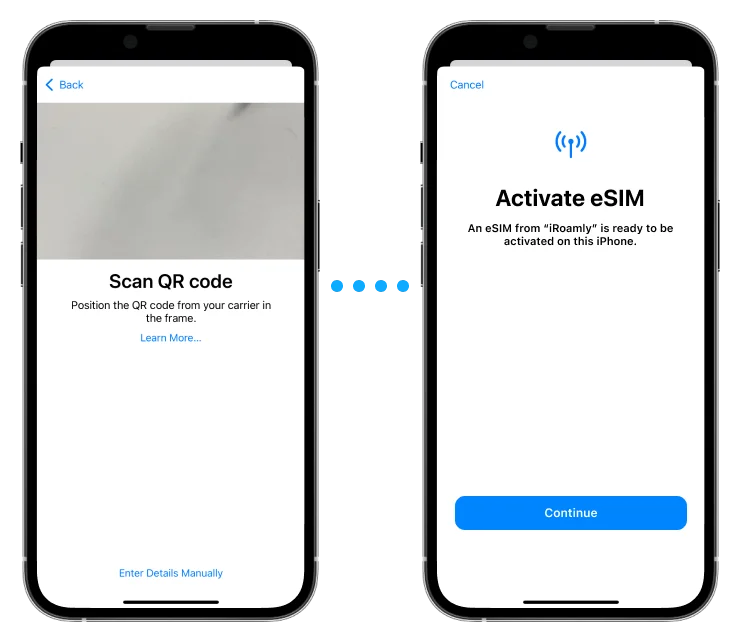
- Use your iPhone's camera to scan the eSIM QR Code provided by your carrier.
- If the QR code is saved on your device, tap 'Choose Photo' to select it from your photo album.
4. Label Your eSIM
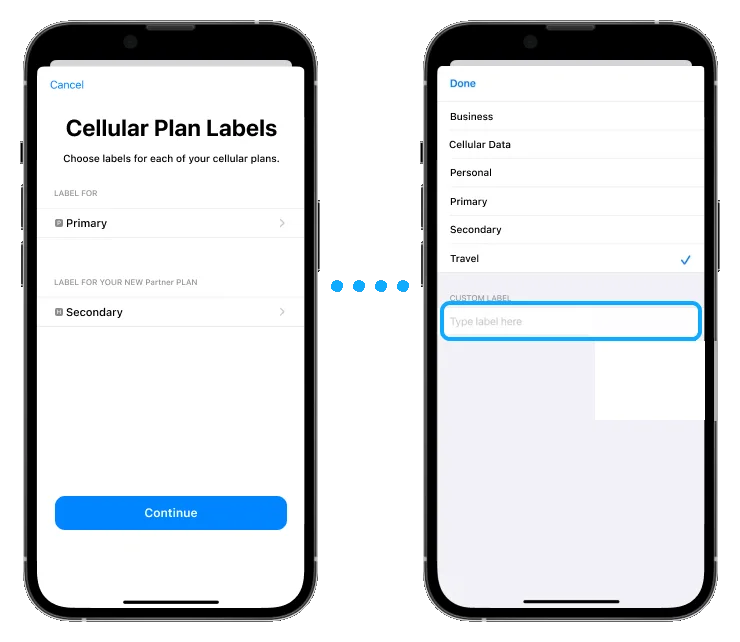
- Assign a descriptive label (e.g., "Travel Plan" or carrier name) for easy identification.
5. Configure Default Line
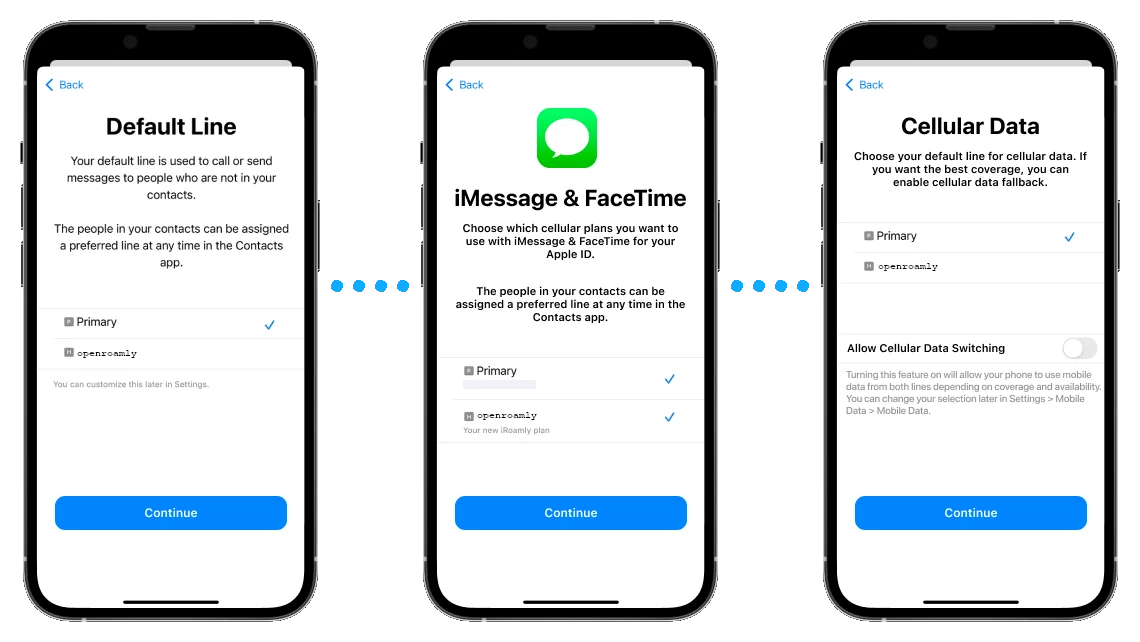
- Select your eSIM as the default line for calls and FaceTime (this setting does not affect cellular data).
6. Finalize Setup
- Your new eSIM will appear under Cellular Plans in Settings. Activation may take up to 15 minutes.
For Manual Installation:
If the QR code is unavailable, select 'Add Cellular Plan' > 'Enter Details Manually' and input the SM-DP+ Address and Activation Code provided by your carrier.
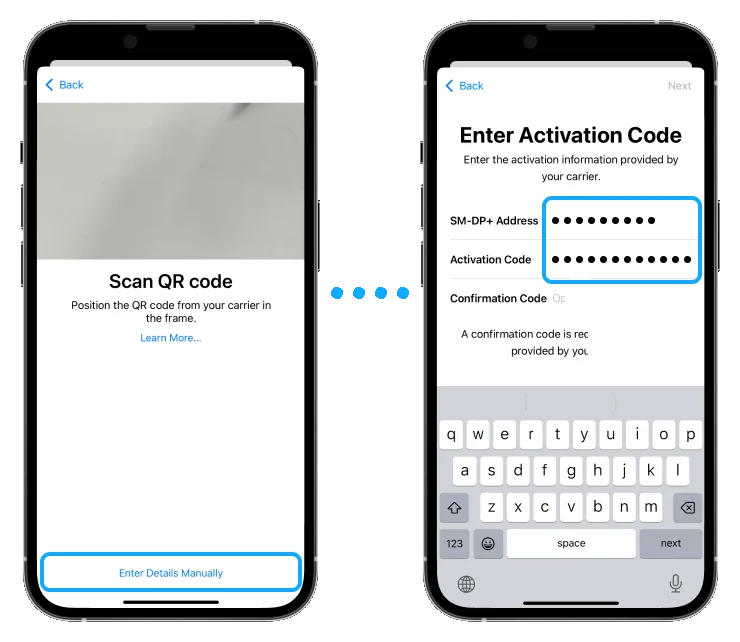
Activating and Configuring Data:
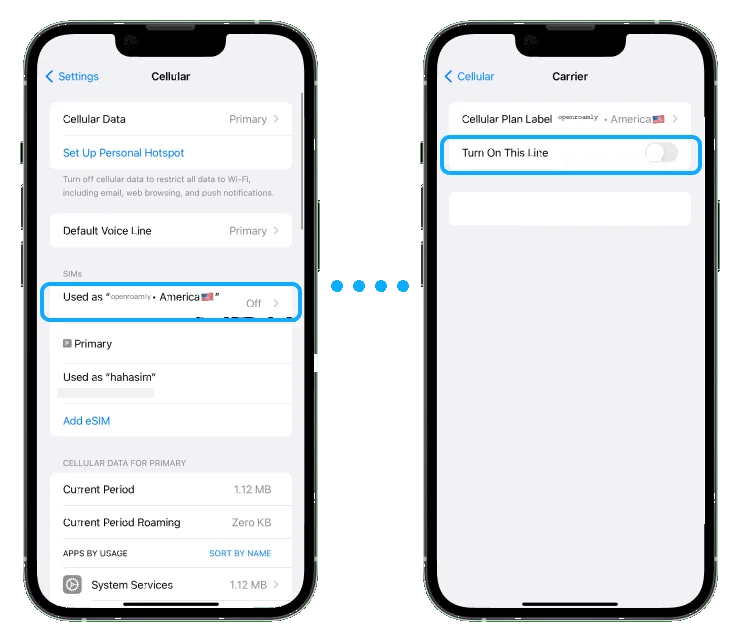
1. Activate eSIM Line:
- In 'Settings > Cellular', tap your eSIM plan and toggle 'TURN ON THIS LINE'.
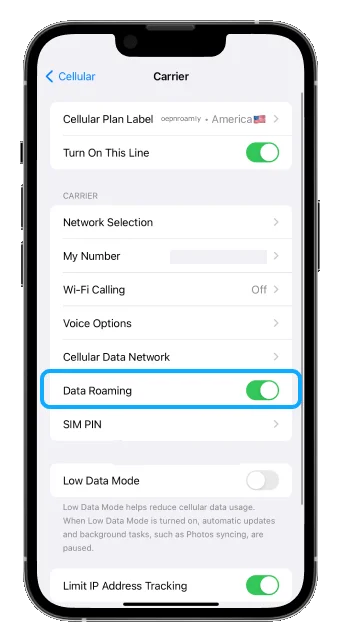
2. Enable Data Roaming (if applicable):
- For international travel, ensure 'Data Roaming' is enabled in your eSIM settings.
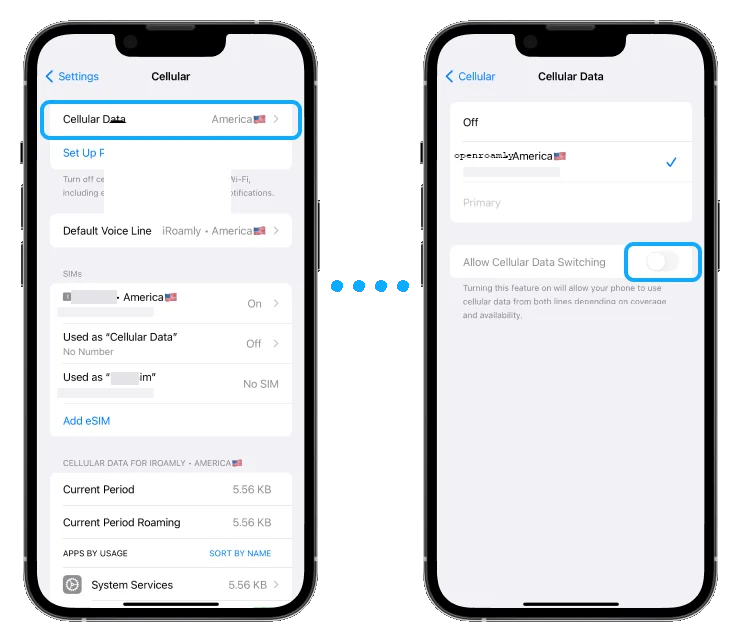
3. Configure Cellular Data:
- Under 'Settings > Cellular', select your eSIM for 'Cellular Data'.
- Disable 'Allow Cellular Data Switching' to prevent unintended usage of your primary line.
4. Network Selection:
- Most carriers automatically select the appropriate network. If manual selection is required, choose your carrier's network under 'Network Selection' in eSIM settings.
Note: Activation success depends on carrier support. Contact your provider if service doesn't activate within 24 hours.